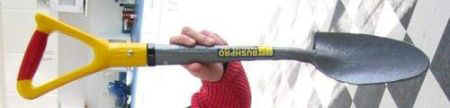
This is the tool which will make all things happen. Inevitably, one can look at it as their golf club. You could even consider having different shovels for different types of ground. You can get a staff shovel (shown here), 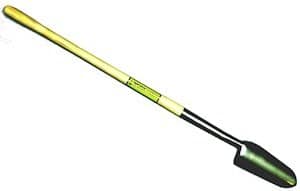 which is a long stick, or a D handle (shown below), which is more common. The advantage of a staff shovel is that it can help you avoid tendonitis, because your hand slides down the shaft in the event you hit a hard rock. The downside is it is more difficult to slam ram the blade into the ground when it is hard and clayey. When I first started planting in rocky ground, I quickly developed tendonitis. My forearm swelled up so much I could not plant for two weeks and had to learn how to brush my teeth and play pool with my left hand (harder than you think, but it has helped me become more ambidextrous). I was told by a veteran planter that I was slamming too hard and that I should learn to let go of the shovel just before it hits anything hard. For years afterwards, I used a wrist brace:
 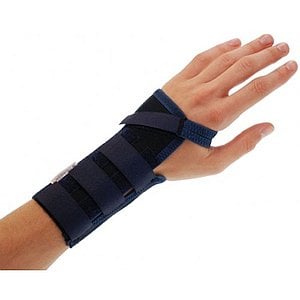 a piece of metal fitting into my palm and velcroed around my wrist to stop it from pivoting up and down and which you should be able to pick up from most pharmacies or medical shops. The tendons are like long strings which are kept close to the muscles and body because they have to go through a ring around the wrist. But if you bend your wrist constantly (at least 5,000 times a day), the tendons will rub against the confining ring and eventually wear away the slippery protective layer around the tendons. Then you have raw tendons rubbing against raw tendons, which will quickly overheat and lead to damage and swelling. I’ve heard stories of planters being dragged to the hospital while kicking and screaming, protesting they want to keep planting.
You get into a frenzy rushing to the next spot, trying to maximise your earnings for that day, your adrenaline gets pumped up and seems to overcome any pain. I was on one contract where the ground was hard and felt great pain in many parts of my body the first two trees after each bagup. Once moving though my body got back into it, but within a few days I decided I needed to take at least one day off, because I felt my tendons were getting close to their limits. It is easy to get carried away and not feel the pain. If you have joint problems you could consider the staff shovel. You can wrap it in duct tape to help stop your hand from slipping down.
 Another advantage of the staff is that your hand can slide down closer to the blade and allow you to manouevre with it, like a hand spade which you can jab with at different sharp angles in order to close the hole properly.
Another argument for the staff is that you can almost lunge it ahead of you, like a spear, in order to position it onto a candidate plantable spot and work on manouevring it into the ground even before you get into your planting stance.
I’ve seen very fast planters use a staff and it all gets down to a question of choice and preference, but most planters seem to prefer the D handle.
I feel I have more control with the D handle, and can twist the blade to help fill the hole. To overcome the danger of hitting a hard rock, especially since I generally have joint problems, I’ve learned to instinctively let go a bit before slamming into the ground. Other times the soil can be mostly soft, so you can take the risk. Or you learn to read the ground better and can almost sense a hard rock coming up.
These come with shock-absorbers.
Or you just absorb the shock, which can reverberate through your entire body and stress all your joints. You should definitely try to avoid this, and if you find yourself in rockier ground, learn to let go of the shovel more before impact. I’ve also learned not to bob the hand up and down so much but rather keep it stiff and parallel with the forarm (if I am not using a wrist brace).
If deciding on a D handle, more experienced planters will cut the staff part, substantially reducing the length. You want to be able to manouevre with it as you twist and turn the blade to help fill your hole. Since you are hunched over with your other hand partially buried in the ground, a longer D handle shovel can make your work awkward. You can always adjust it later after you gain some experience.
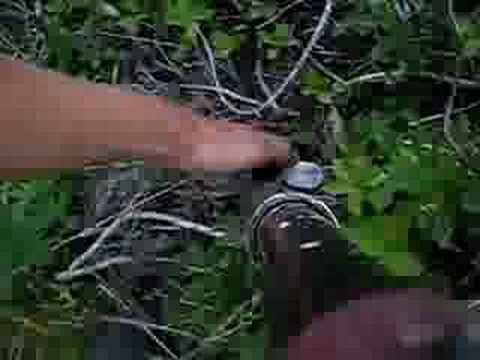
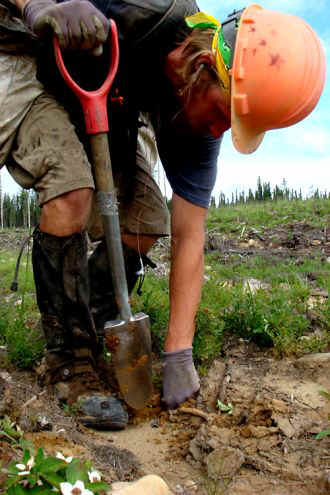
Highballer with a d-handle using a slight c-cut twist to create his hole (twisting is harder with a staff), occasionally using the blade to help close the hole. Notice how he once jumped on both kickers, as if he wanted to avoid a repeat of the struggle with the previous tree and just get down to business to keep his momentum.
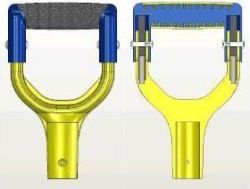
There seems to be quite some discrepancy as to the choice of blade. The very fastest planters seem to have a larger blade. Many though use a smaller and not as broad blade, such as the WorkWizer, which comes automatically with one kicker removed. I once tried this but found that whatever time I saved penetrating the shovel into the ground was more than offset by the struggle I had forcing a straight plug into a smaller hole. Also, I’ve been told they are a bit weaker and have occasionally been found to bend in half when struggling against roots and rocks. The good thing about the larger blade of a Bushpro is that you can always cut it down to a smaller size (most camps should have an electric cutter for this purpose).
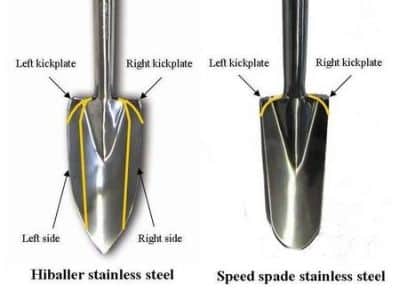
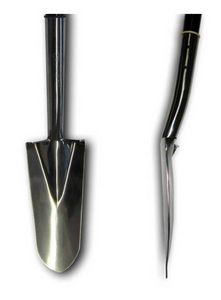
The new generation (pictured right) are bent inwards a bit and have a pointy tip, for quicker penetration. You can sharpen your blade in the same way, but first try experimenting (borrow) with other blades before cutting down your larger one. I’ve heard that WorkWeizers can bend in half in tougher ground.
Many people like to cut off one of the kickers – to reduce weight (although weight, if you can handle it, can be an advantage since you can use the extra momentum to get the blade into the ground with less muscle or shock to your body) or to help you pull the shovel out of rooty ground.
But I found that the rare times where one of my kickers would get snagged on a root as I was trying to pull it out of the ground were far outweighed by the advantage of being able to use either kicker to push the blade into the ground. As I close a planted hole, depending on my standing position and the obstacles around me, I might step off with either my left or right foot. And depending on how many steps it takes to get to the next plantable spot, I couldn’t be sure whether the left or right foot would get to the next spot first. Sometimes I would use the left kicker with my right foot. Whenever I borrowed a shovel with only one kicker, it annoyed me to have to concentrate on always ending with the same foot on the same side. But you only need to use the kicker occasionally, when the ground is harder (clayey, rocky, or perhaps rooty).
The angle of the blade to the parallel of the D handle can also change. The standard is a slight angle, but others have radically changed it so that they can push the blade down to their side instead of in front of them (the blade has a 90 degree twist to the handle). Again, you can experiment in camp with other planters’ shovels and then adjust yours to your choosing.

A short shovel like this would be suitable for very steep ground.
Next: |
We are a family operation managing private custom boat tours in the beautiful Palawan area, and are happy to help travelers with their plans through the country, having traveled a lot of it ourselves and planning to visit it all. The pages in this section concern when I was treeplanting in Canada over eight summers.